Diamond grinding disc

4-Step Diamond Dry Grinding Disc

3-Step Diamond Dry Grinding Pad: A Complete Guide for Efficient Stone Polishing

When it comes to stone polishing—whether for marble, granite, or engineered stone—efficiency, quality, and convenience are the top priorities for stone fabricators and contractors. Traditional grinding and polishing processes often require multiple pads, complex steps, and plenty of water, leading to high labor costs, messy workspaces, and extended project timelines. That’s where the 3-step diamond dry grinding pad comes in: a game-changer designed to simplify your workflow, cut down on time, and deliver consistent, professional results—all without the need for water.
In this blog, we’ll break down everything you need to know about 3-step diamond dry grinding pads: what they are, how to use them step by step, their core advantages, and answers to the most common questions. By the end, you’ll understand why this tool is becoming a must-have for stone professionals worldwide.

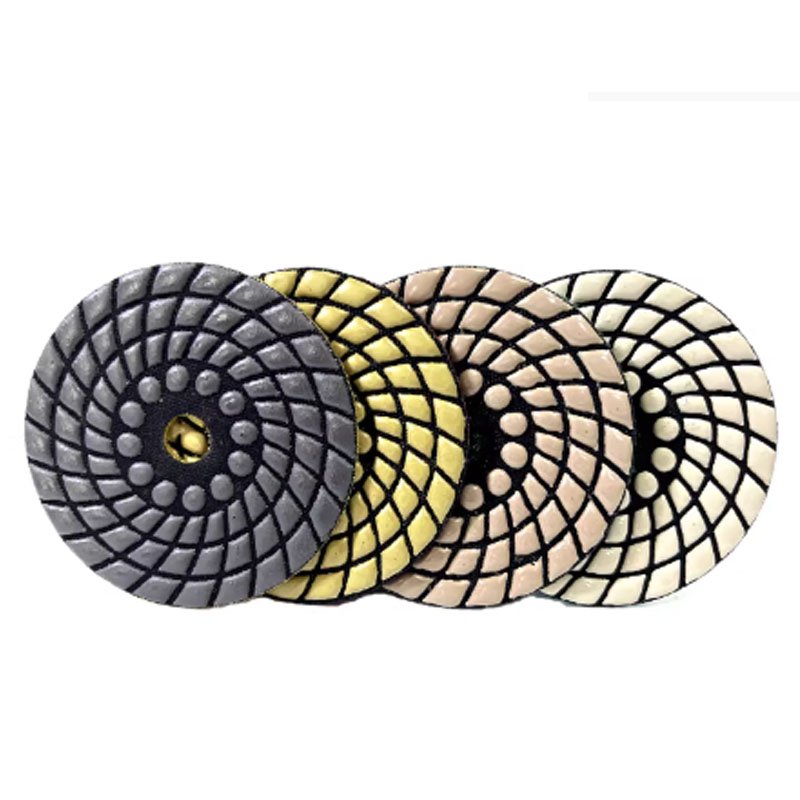
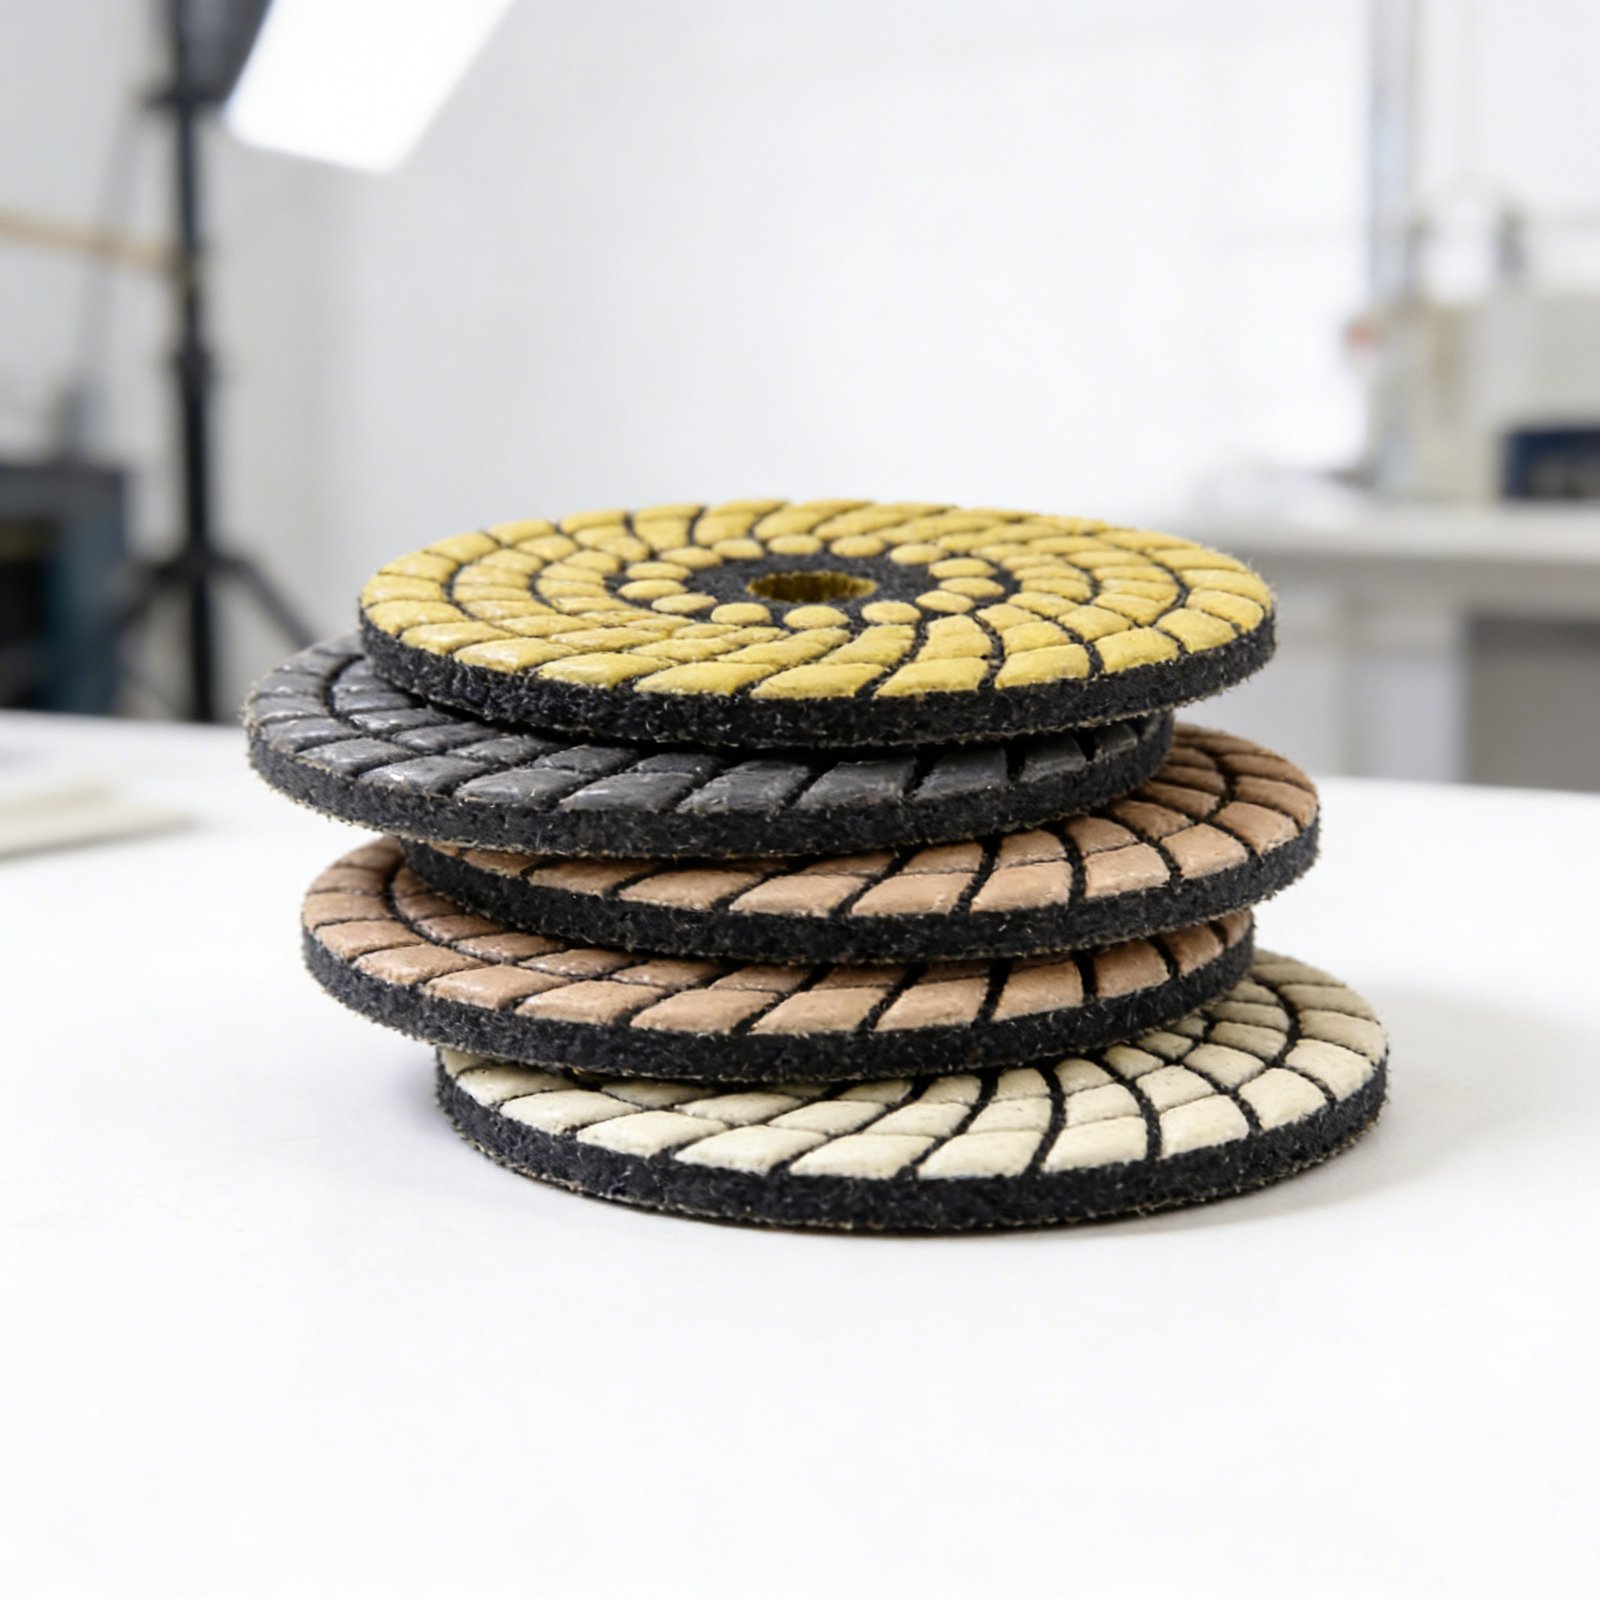
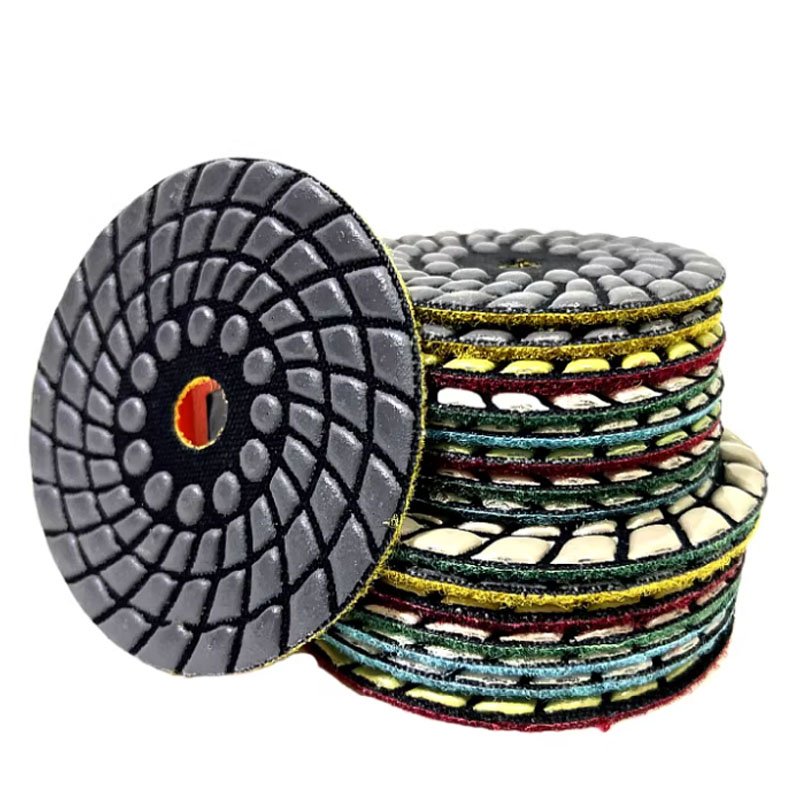
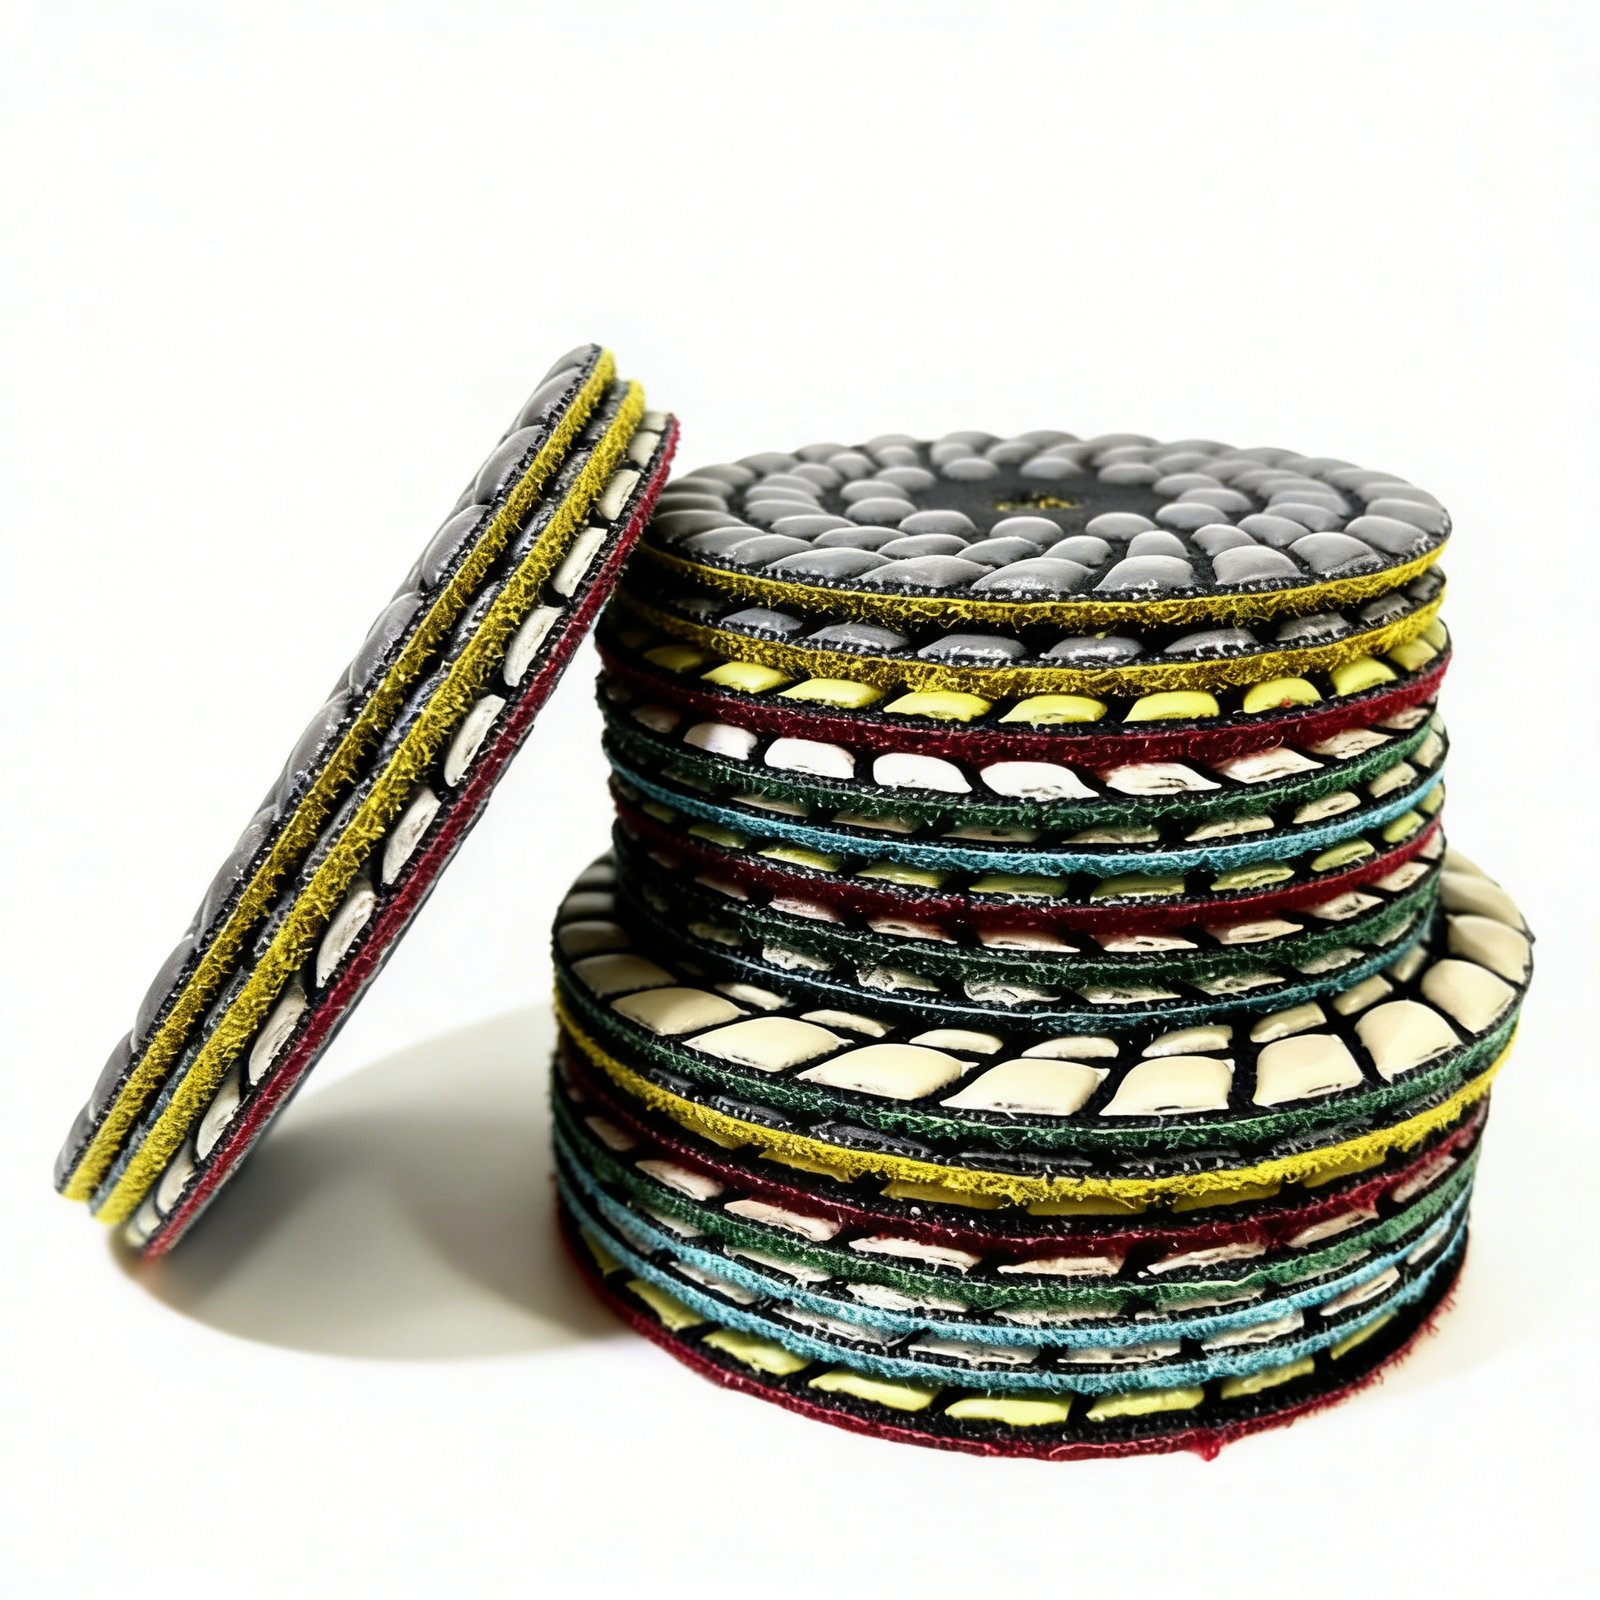
What Is a 3-Step Diamond Dry Grinding Pad?

A 3-step diamond dry grinding pad is a specialized tool designed for dry grinding and polishing of natural and engineered stones. Unlike traditional wet grinding pads that require water to cool the pad and reduce dust, dry grinding pads use advanced diamond grit technology and heat-resistant resin binders to work efficiently without water. As the name suggests, it integrates three grinding stages—coarse, medium, and fine—into a single set, eliminating the need to switch between multiple pads during the polishing process.
Each pad in the 3-step set is engineered with a specific diamond grit size to tackle a different stage of the polishing process: coarse for removing scratches and leveling the surface, medium for refining the texture, and fine for achieving a high-gloss, mirror-like finish. This all-in-one design streamlines the workflow, making it ideal for both small-scale projects and large-volume production.

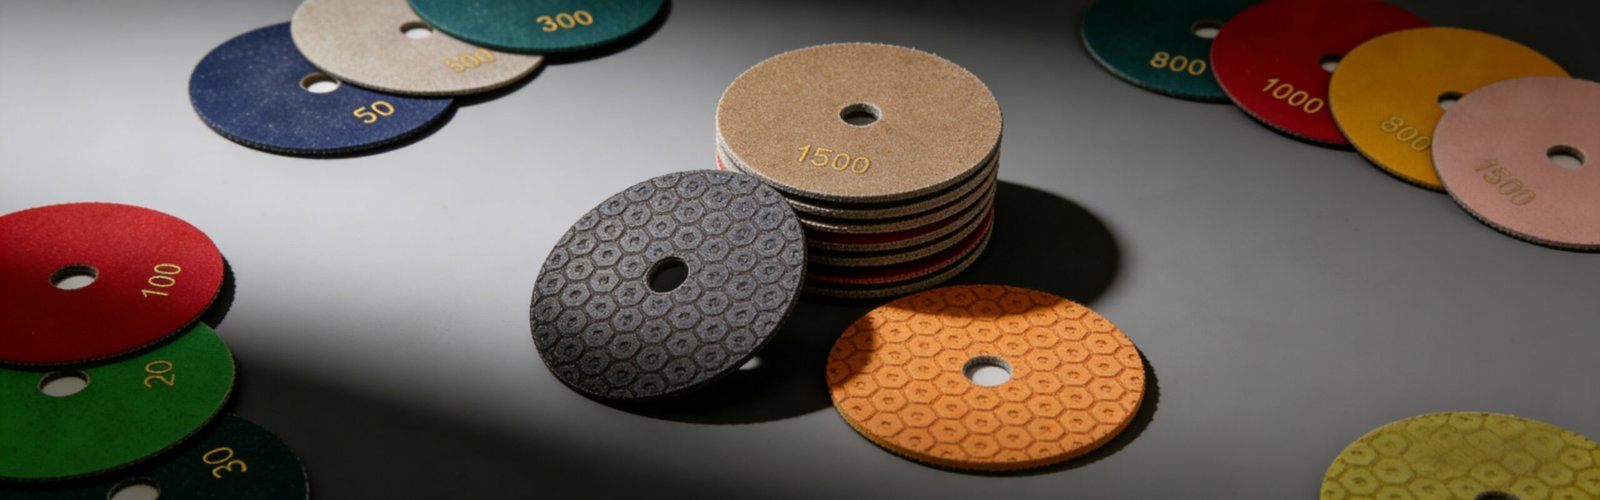
Step-by-Step Guide to Using 3-Step Diamond Dry Grinding Pads

Using a 3-step diamond dry grinding pad is simple and straightforward—even for beginners. Follow these three steps to achieve professional-quality results every time. Note: Always wear appropriate personal protective equipment (PPE), including safety goggles, a dust mask, and gloves, to protect against dust and debris.

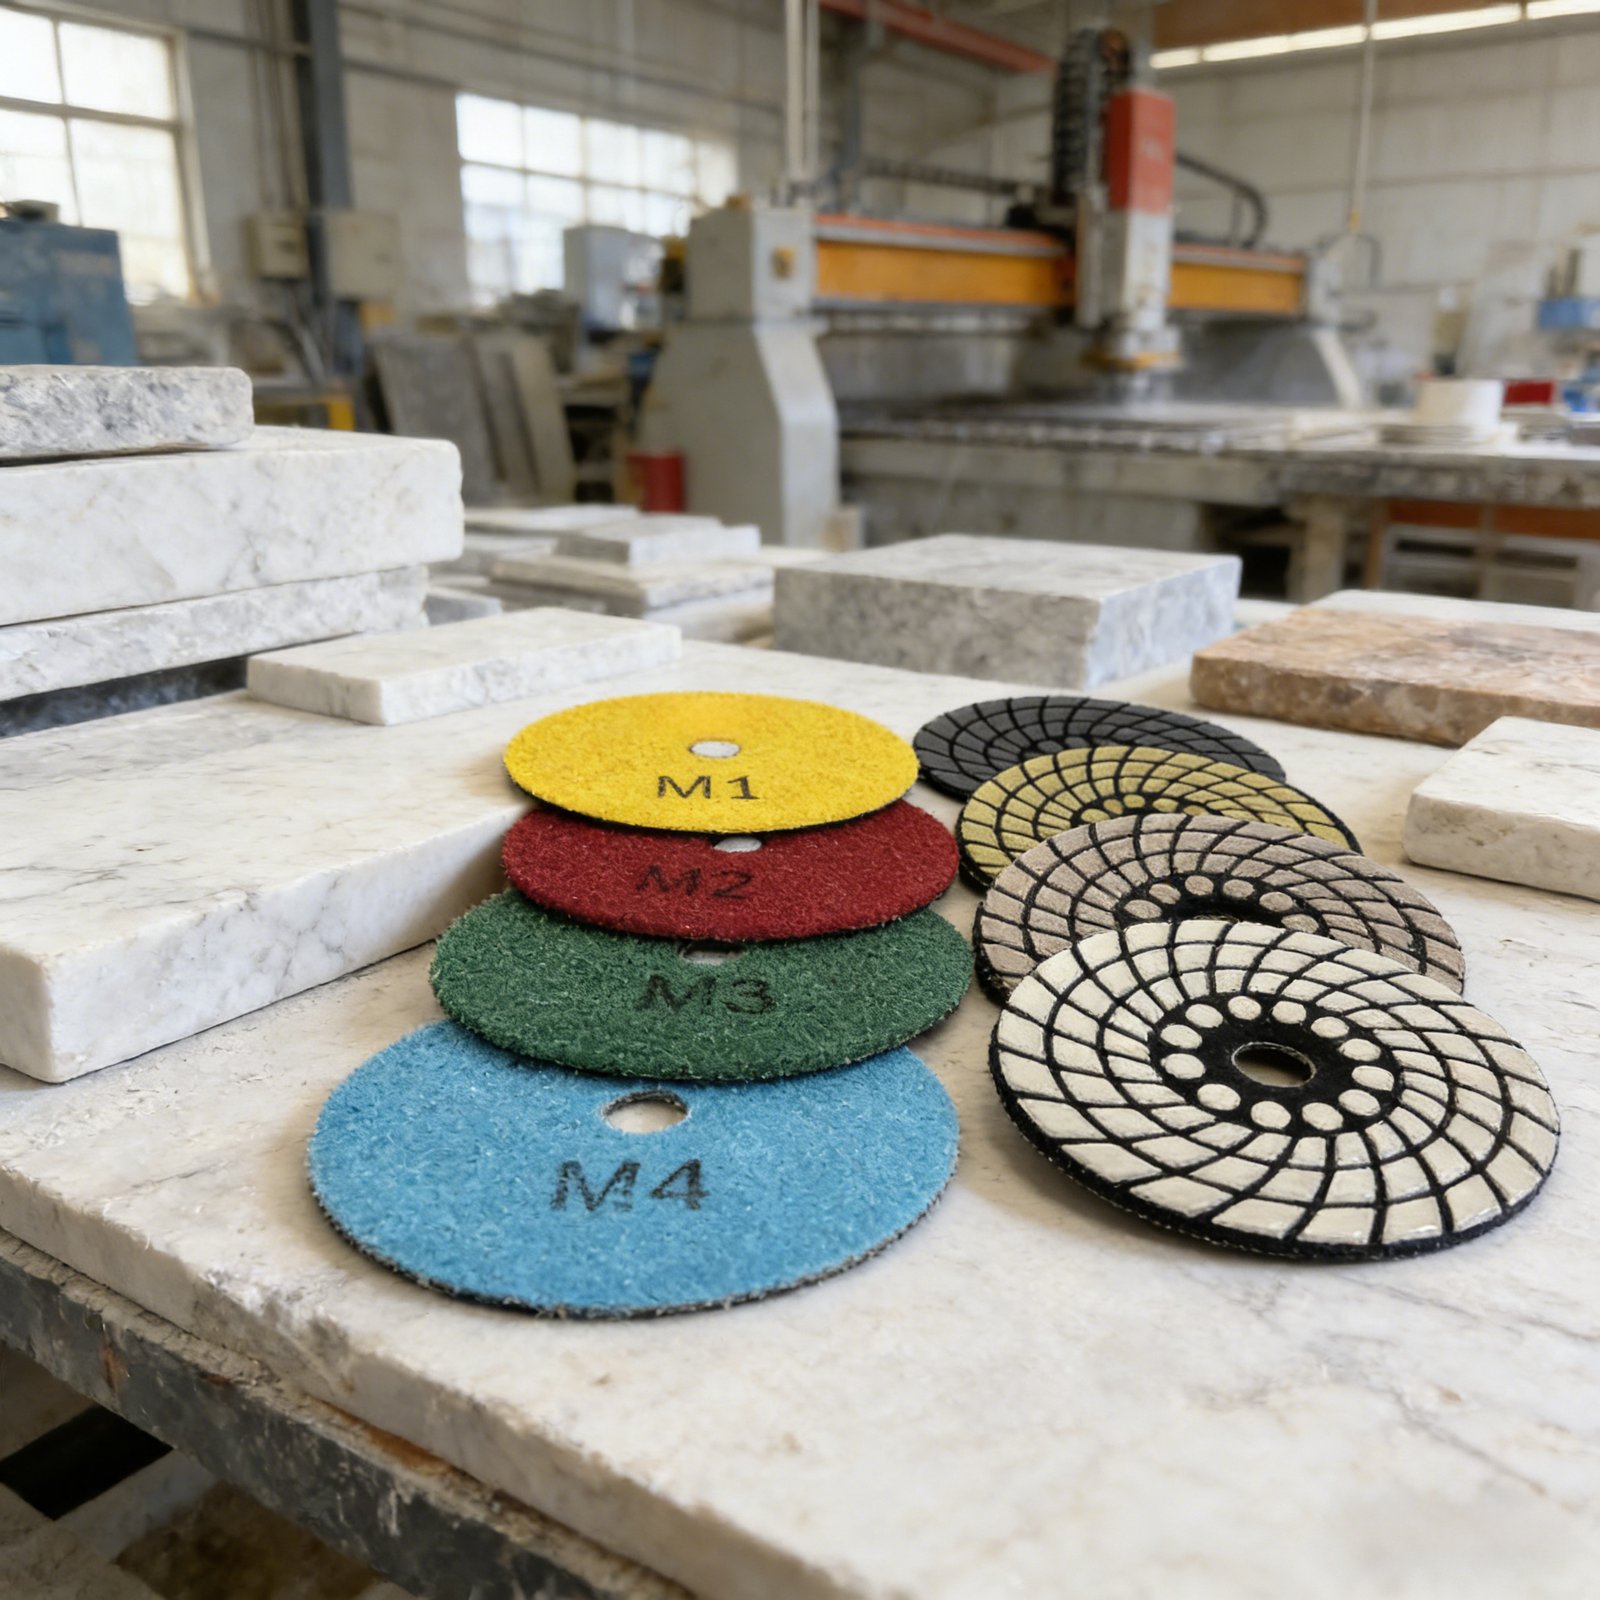
Step 1: Coarse Grinding (Grit M1) – Level and Smooth the Surface

The first step focuses on removing imperfections, deep scratches, unevenness, and surface defects from the stone. Start by attaching the coarse grit pad (typically 50-100 grit) to your angle grinder or stone polishing machine. Ensure the pad is securely fastened to the flange to avoid slipping or wobbling during use.
Turn on the machine and hold it at a 15-30 degree angle to the stone surface. Move the pad in slow, overlapping circular motions, applying consistent medium pressure. Work in small sections (around 1-2 square feet at a time) to ensure even grinding and avoid missing any areas. The goal here is to level the surface, remove any deep scratches, stains, or rough spots, and create a uniform base for the subsequent steps. Continue grinding until the surface feels smooth to the touch and all major imperfections are eliminated.

Step 2: Medium Grinding (Grit M2) – Refine the Texture

Once the coarse grinding is complete, switch to the medium grit pad (200-400 grit). This step is critical for refining the surface texture, removing the fine scratches left by the coarse pad, and preparing the stone for the final polishing stages. It bridges the gap between rough leveling and smooth polishing, ensuring a consistent base.
Repeat the same circular motion as in Step 1, but reduce the pressure slightly to avoid creating new scratches. Work in the same small sections, ensuring full coverage and even grinding. You’ll notice the stone surface becoming significantly smoother and more uniform as you grind—this is a clear sign that you’re ready to move to the next step.

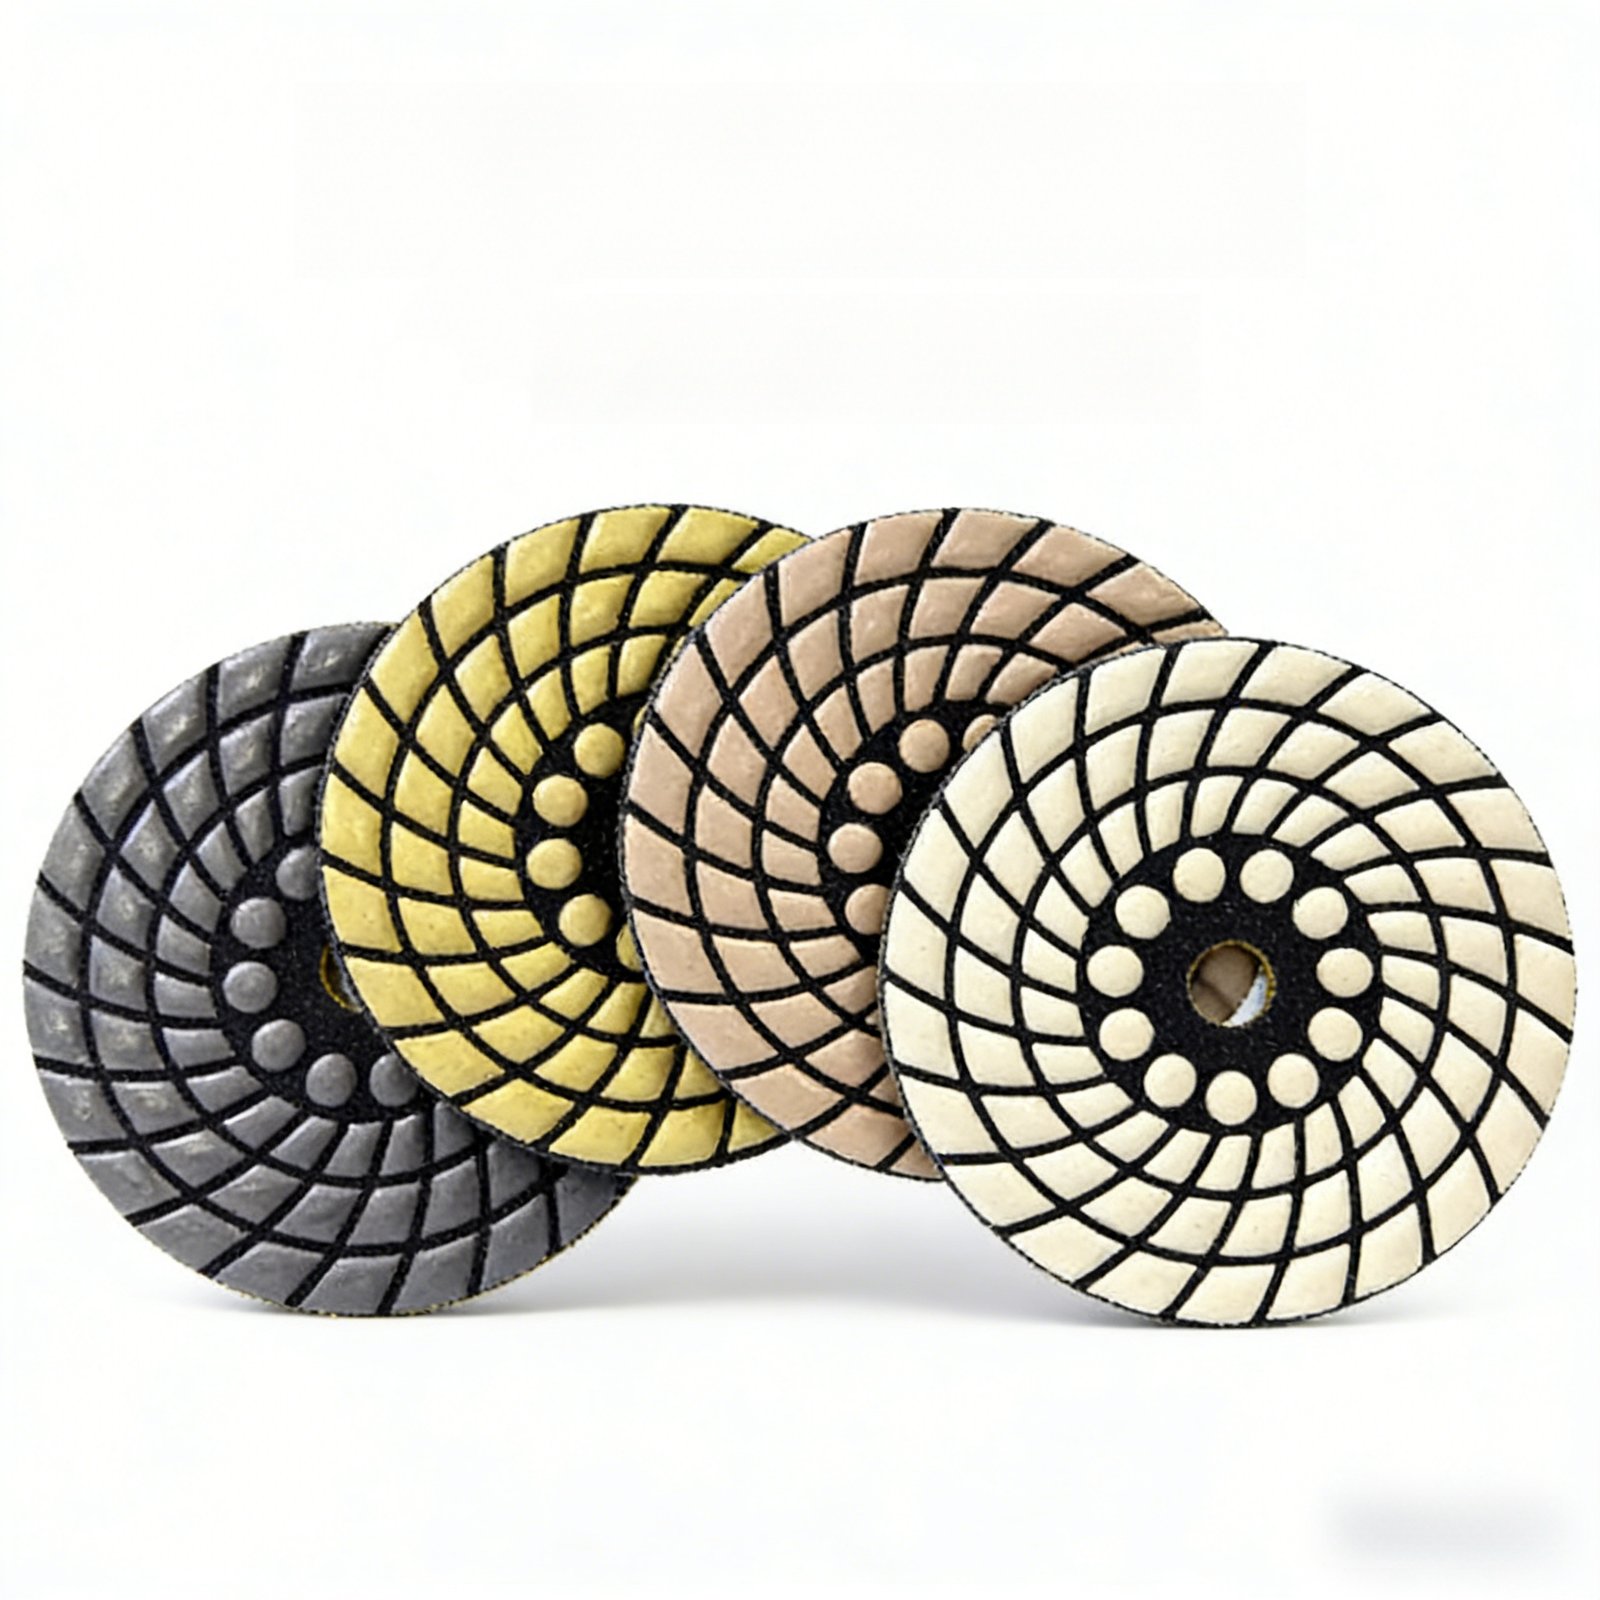
Step 3: Fine Grinding (Grit M3) – Enhance Smoothness

The third step uses the fine grit pad (M3 grit) to further refine the surface, eliminate any remaining micro-scratches from the medium pad, and enhance the stone’s natural smoothness. This step is key to achieving a high-gloss finish in the final stage, as it creates a perfectly smooth base for the ultra-fine pad.
Attach the fine grit pad to your machine and continue with slow, overlapping circular motions, applying light to medium pressure. Take your time with this step—rushing can result in uneven smoothness, which will affect the final gloss. As you grind, the stone will begin to show a subtle luster, indicating that it’s ready for the final polishing step.

Step 4: Ultra-Fine Polishing (Grit M4) – Achieve a Flawless Mirror Finish

The final step is to use the ultra-fine grit pad (M4 grit) to achieve a flawless, mirror-like finish that highlights the stone’s natural beauty. This step is what sets 4-step dry grinding pads apart—they deliver a more refined, consistent gloss than 3-step sets, with no visible scratches or unevenness.
Attach the ultra-fine pad to your machine and use slow, gentle circular motions, applying light, consistent pressure. Avoid applying too much pressure, as this can overheat the pad or damage the stone’s surface. Work in small sections, overlapping your motions slightly to ensure full coverage. As you grind, you’ll see the stone’s natural luster shine through more intensely, eventually achieving a smooth, reflective finish. Once you’re satisfied with the gloss level, turn off the machine and wipe the surface with a clean, dry cloth to remove any dust or debris.

Why Choose 3-Step Diamond Dry Grinding Pads?

Compared to traditional wet grinding pads or single-step dry pads, 3-step diamond dry grinding pads offer a range of advantages that make them a better choice for stone professionals. Here are the key benefits:

1. Time-Saving and Efficient

With three grinding stages in one set, you don’t need to stop and switch between multiple pads. This reduces downtime and speeds up the polishing process—saving you hours on each project. For large-scale production, this efficiency can translate to significant cost savings.

2. No Water Required (Dry Operation)

Dry grinding eliminates the need for water, which means no messy workspaces, no water waste, and no risk of water damage to the stone or surrounding areas. It also allows you to work in areas where water access is limited or prohibited.

3. Consistent, Professional Results

Each pad is engineered with precise diamond grit sizes, ensuring a smooth transition between grinding stages. This consistency results in a uniform, high-gloss finish every time—no more uneven surfaces or inconsistent shine.

4. Durable and Long-Lasting

3-step dry grinding pads are made with high-quality diamond grains and heat-resistant resin binders, making them more durable than traditional pads. They can withstand high temperatures generated during dry grinding and maintain their sharpness for longer, reducing the need for frequent replacements.

5. Versatile for Multiple Stone Types

These pads work seamlessly with a variety of stones, including marble, granite, quartz, travertine, and engineered stone. Whether you’re working on a countertop, floor, or wall, the 3-step set can handle the job.

发表回复

您的邮箱地址不会被公开。 必填项已用 * 标注